
Tried that and it dunna workfishlips wrote:Once you've seen how the flaps are cut out you will be out and about cutting holes everywhere.
On some A/C they can be a chalenge but if you spend a bit of time and set up a templete from the original part and using additional points to help keep the angles correct and positioned all should go fairly well.
The download hangar is currently disabled. We're doing our best to bring it back as soon as possible.
F-101B Dark Horse Project
Re: F-101B Dark Horse Project
-
fishlips
Re: F-101B Dark Horse Project
cheer's,
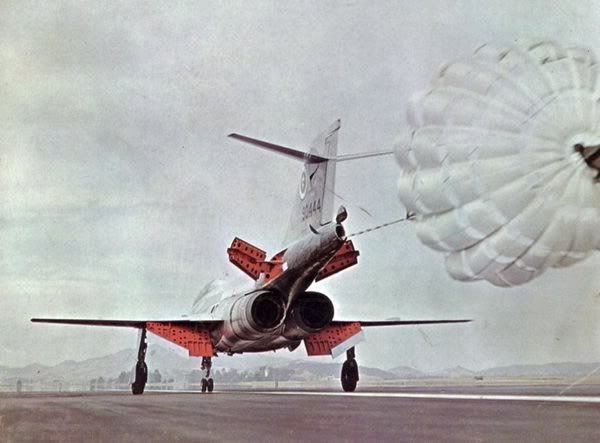
PS: Brian, I don't wish to send mixed messages here but you are aware that Mike P has the F-101 on his to-do list. See pic below taken from his Mad Mike thread. You may wish to drop Mike a PM to save double work being produced or may be colaberate with him in some way. Totally up to you of course!
Re: F-101B Dark Horse Project
Mark
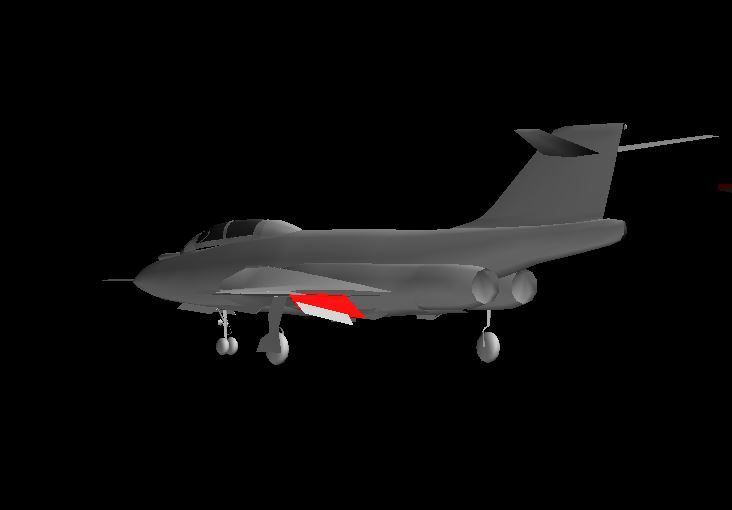
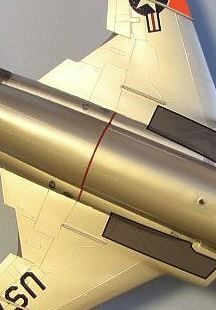
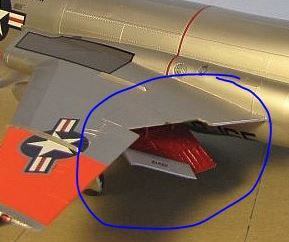
Thank's for yer attempt but the flaps will be a real bitch to do . As you can see from the pic's the top surface cuttout is way smaller and a different shape than the underside cutout . Methinks I should've picked a much simpler A/C for my 1st attempt 


As for the "mixed message" PS: I did pm Mike regarding this ,the F-5 , and the 104 back in August '12
Thank's for yer attempt but the flaps will be a real bitch to do . As you can see from the pic's the top surface cuttout is way smaller and a different shape than the underside cutout . Methinks I should've picked a much simpler A/C for my 1st attempt
As for the "mixed message" PS: I did pm Mike regarding this ,the F-5 , and the 104 back in August '12
-
fishlips
Re: F-101B Dark Horse Project
Brian,
The example I have shown is no less difficult to make that which the photos show. Remember you have polys on the top and bottom of the wing which you can totally separate and control. As you can see in my pic, the upper poly lines don't align with the lower poly lines and even if they did, it makes no difference to how you can cut-out a part and rebuild the area surrounding using triangle polys.
Making the lower flap cut-out is simply made by cutting out the lower polys to the shape required of the flap. The upper inner surface of flap is then a cope/paste of the lower flap that you just made with the forward points raised to the correct angle.
I know it sounds difficult, especially for your first aircraft but once you've done it, you'll never look back. Like I said, I'm willing to help you so just make the airframe of your choice, be it this one or something else and then I'll help you through the cut-out and animation phases.
If you like I can send you a piece of an AI that shows you how I go about joining/welding wing points to a fuselage. It does take a little bit of time to set up using templates but it makes for an perfect point to point join. I may even go back to some of my older AI my self and redo them.
cheer's,
-
relfel66
- First Lieutenant

- Posts: 116
- Joined: 24 Jan 2009, 21:10
- Version: FS9
- Location: South of CYZR North of CNZ3
Re: F-101B Dark Horse Project
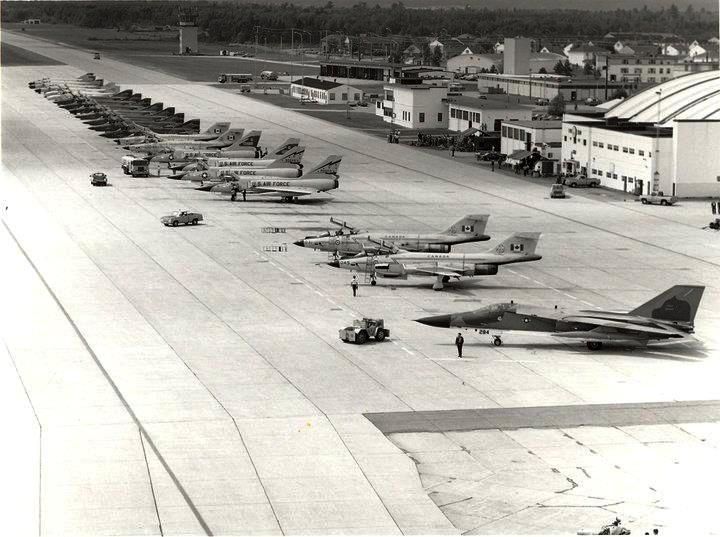
CFB Chatham?
Re: F-101B Dark Horse Project
Thank's Mark .I'll be giving this a try this PM .I hope the Australian GP broadcast doesn't cut off the F-18 flypast again this year !fishlips wrote:Brian,
The example I have shown is no less difficult to make that which the photos show. Remember you have polys on the top and bottom of the wing which you can totally separate and control. As you can see in my pic, the upper poly lines don't align with the lower poly lines and even if they did, it makes no difference to how you can cut-out a part and rebuild the area surrounding using triangle polys.
Making the lower flap cut-out is simply made by cutting out the lower polys to the shape required of the flap. The upper inner surface of flap is then a cope/paste of the lower flap that you just made with the forward points raised to the correct angle.
I know it sounds difficult, especially for your first aircraft but once you've done it, you'll never look back. Like I said, I'm willing to help you so just make the airframe of your choice, be it this one or something else and then I'll help you through the cut-out and animation phases.
If you like I can send you a piece of an AI that shows you how I go about joining/welding wing points to a fuselage. It does take a little bit of time to set up using templates but it makes for an perfect point to point join. I may even go back to some of my older AI my self and redo them.
cheer's,
Re: F-101B Dark Horse Project
Yes sir !! With plenty of USAF visitors for the party ,er, combat excercisesrelfel66 wrote:CFB Chatham?
-
relfel66
- First Lieutenant
- Posts: 116
- Joined: 24 Jan 2009, 21:10
- Version: FS9
- Location: South of CYZR North of CNZ3
Re: F-101B Dark Horse Project
Very nice, love the home country ai!
Re: F-101B Dark Horse Project
Crawling along slowly at a snails pace . Delved into Gmax for awhile only to discover that the project HAD to be measured in Metric  To put the 3 views into FSDS is a 60 second process . To do same in Gmax is &%$#@#% . I'd like to see the slicing tool added into FSDS and that would put the program more on a parr with Gmax
Main lesson I've learned along the way is there are 4 very different methods of making wings . Mark Griggs ( Fishlips) has a handle on the best .
One more lesson is PLAN AT LEAST 10 STEPS AHEAD
Main lesson I've learned along the way is there are 4 very different methods of making wings . Mark Griggs ( Fishlips) has a handle on the best .
One more lesson is PLAN AT LEAST 10 STEPS AHEAD


Re: F-101B Dark Horse Project
Wings can easily be made out of a tube part. That wing template function in FSDS is worthless IMO.
Like you said, you just have to plan ahead for the number of points in your tube and number of cross sections.
I like working initially with the wing parts in the cross section mode because it allows you to add and subtract cross sections to the part without losing any of the work.
If you take tube part, align it along the X axis, scale the part symmetrically in the Y axis, that will squish it down immediately into an airfoil shape. From there it's just refining the shape as you go. Pretty straight forward.
It's all the cutting bits and pieces out of each part that's the real PITA.
-Mike G.
Recovering flight sim addict, constant lurker.
Check out my real life RV-8 build here: RV-8 Builder Log
Recovering flight sim addict, constant lurker.
Check out my real life RV-8 build here: RV-8 Builder Log
Re: F-101B Dark Horse Project
That's the way I've been makin' em . Thank's for posting the tip on using cross sections ! That'll make life a little easier . I'd never thought of using it to + or - a x-section .MIKE JG wrote:Wings can easily be made out of a tube part. That wing template function in FSDS is worthless IMO.
Like you said, you just have to plan ahead for the number of points in your tube and number of cross sections.
I like working initially with the wing parts in the cross section mode because it allows you to add and subtract cross sections to the part without losing any of the work.
If you take tube part, align it along the X axis, scale the part symmetrically in the Y axis, that will squish it down immediately into an airfoil shape. From there it's just refining the shape as you go. Pretty straight forward.
It's all the cutting bits and pieces out of each part that's the real PITA.
Re: F-101B Dark Horse Project
Once you get the part in the general shape you want, you'll have to switch to point mode and start moving or scaling groups of points but not the whole cross section. So get it as close to the shape you need before switching to something other than cross section mode.
Once you merge points or delete some, you can no longer use cross section mode.
It's typical to remake parts multiple times since you learn from the process of each previous one.
Once you merge points or delete some, you can no longer use cross section mode.
It's typical to remake parts multiple times since you learn from the process of each previous one.
-Mike G.
Recovering flight sim addict, constant lurker.
Check out my real life RV-8 build here: RV-8 Builder Log
Recovering flight sim addict, constant lurker.
Check out my real life RV-8 build here: RV-8 Builder Log
Re: F-101B Dark Horse Project
MikeMIKE JG wrote:Once you get the part in the general shape you want, you'll have to switch to point mode and start moving or scaling groups of points but not the whole cross section. So get it as close to the shape you need before switching to something other than cross section mode.
Once you merge points or delete some, you can no longer use cross section mode.
It's typical to remake parts multiple times since you learn from the process of each previous one.
Little did I know just how an accurate statement that was
Re: F-101B Dark Horse Project
067 with a good crew and all her electric equipt. turned on , turned out to be the best interceptor in her time !!relfel66 wrote:Electric Voodoo
Re: F-101B Dark Horse Project
MIKE JG wrote4- Would modelling a left side and then copy/pasting the whole model alleviate these problems?
Yes this is a very good technique that Jake Burrus introduced us to. If you only have to model one half of the aircraft, it's a lot less work. Once you are happy with the shape, you simply copy/paste/transform/flip the part to mirror it. One thing to note about doing only one half of a fuse part: Try to leave or move the part's axis to the 0 point of the X axis. That way when you flip it, you don't have to reposition it like you do a wing part. If you have to you can just like you would with the wing but having the fuse part's axis right in the middle will save you a lot of headaches.--------------------------------------------------------------------------------------------------------------------------------
Got the #@%$& looking good and used this technique to get right side parts onto the model.
One question--- How do I Join the left fuselage 1/2 to the right ? tried the ctrl +J and dunna work as I'm getting a pronounced seam @ the edge
Re: F-101B Dark Horse Project
Currently studying how to do an FDE/Air file and this is fast becoming a Dead Horse Project instead of the F-101B Dark Horse Project 
UGLY ( to me ) seam along fuselage and canopy ! Looks like only way to get rid of them is to redo (FAK !!!!!!!) . Currently have 34 old .fsc files that I'm filing away , only to keep track .
AIR and FDE files look like Chinese to write !
Texturing is "sort of" going well .
STILL NEED A PILOT MODEL !!!!!!!!!!!!!!!!!!!!!!!!!!!!!!!!!!!!!!!!!!!!!!!!!!!!!!!!!!!!!!!!!!!!!!!!!!!!!!!!!!!!!!!!!!!!!!!!!!!!!!!!!!!!!!!!!!!!!!!!!!!!!!!!!!!!!!!
Re: F-101B Dark Horse Project
Pilot done !!!!!! It helps to have a large selection of Gentex slides and to have sketched many pilots!To anyone that's starting out ,may I suggest modelling your pilot 1st .It will help develop skills needed later and is actually fun to do .
One more lesson learned- TURN OFF Move ,Rotate and Scale Modes before selecting/changing Part ,Poly , Point or X Section Mode . Items WILL shift I guarantee it .
One more lesson learned- TURN OFF Move ,Rotate and Scale Modes before selecting/changing Part ,Poly , Point or X Section Mode . Items WILL shift I guarantee it .
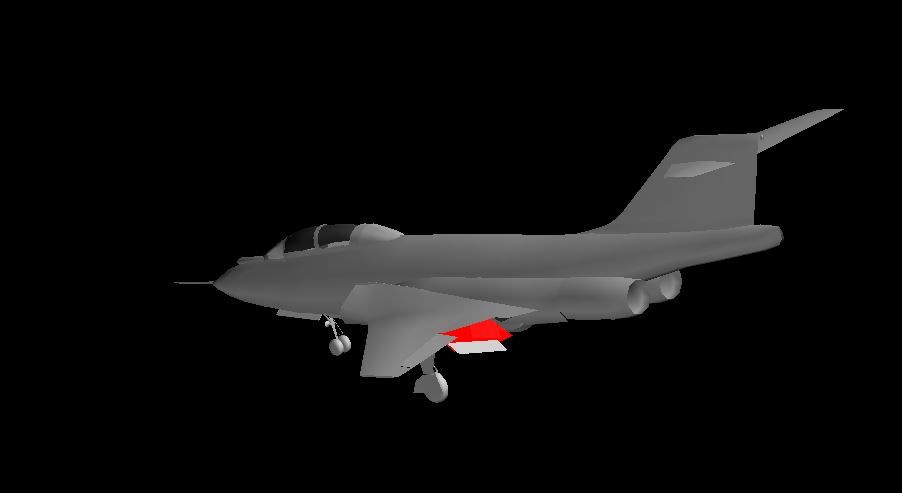
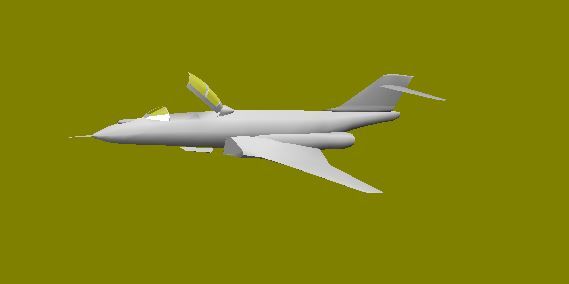
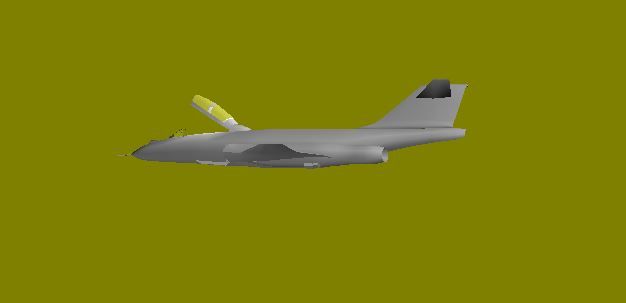
F-101B Dark Horse Project-Progress update
Still working on this .Methinks I coulda chosen a much easier subject as th 101 is a very intricate design and nothing, except for the horizontal stab's, is easy to replicate . Pic's show gear sprung and flaps down . Main gear doors were a bitch to get "almost" right in their 3 sections as on the original and the flaps were even harder to do ! I almost gave up due to trying to model the flaps . And I thought the speed brakes were hard I am now committed to finishing this